I own a 2012 MacBook Air, and while nowadays it is mostly used for web browsing and other light tasks, it was always a great machine. I’ve had it for 14 years now, and since I’ve updated the battery 2 years ago, it really didn’t feel that old… if not for the software. Last macOS update was Catalina, and it stopped receiving security updates in 2022. I’ve tried updating using Open Core Legacy Patcher, and bumped the version to Sonoma, but it wasn’t that great. It worked, but it was constantly freezing for half a minute, making it frustrating to do any work.
Since it has an Intel CPU, I thought about installing Linux for a while, but multiple blog posts I’ve read suggested that it’s complicated, or requires some initial steps to be done on macOS first. I wasn’t sure it would even work.
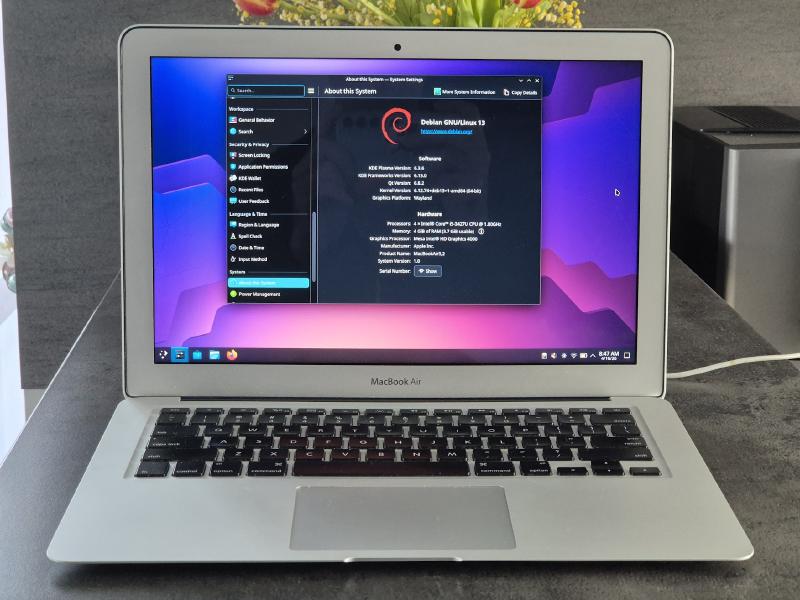
I’ve recently switched my daily working PC to Debian Trixie, running the latest KDE, and I was really surprised how much KDE has improved over the years. Installation was almost painless, and I thought: ok, now it’s the time to give the MacBook a try. And the whole process turned out to be much easier than I expected.
Disclaimer #
Do this at your own risk. It worked for me at the time of writing this post, but your experience may vary, as usual 🙂 Worst case, macOS can apparently be restored via Internet Recovery - but I haven’t tried this myself.
Hardware #
- MacBook Air mid 2012 (MacBookAir5,1/5,2), 4GB RAM, 128GB Apple SSD, BCM43224 WiFi
Prerequisites #
- backup your data, as we are going to wipe whole drive content
- download Debian image to USB stick; I’ve used Live KDE iso, as I wanted to give it a try first, before installing; use amd64 architecture, obviously
That’s it. No need to do any other steps on Mac, really. The only thing you might want to do before proceeding is disable the startup chime - but other than that, you are good to go.
First Boot #
Shut down your computer. Insert the USB stick and start the MacBook, pressing the Option key. You should see multiple boot options - pick the one saying EFI Boot with a USB symbol. After a while, you should see the Debian installer screen.
From there, you can try Debian before installing it. My advice is to give it a go first, to make sure all hardware works and to get a feel for how it looks on your Mac. There’s one caveat - since it uses a live image, it takes around 1GB of extra RAM, so if you fire up a browser and start opening tabs, it may hang as there’s no swap configured. But don’t worry, performance is much better on a proper installation.
First gotcha: I do not recommend using the Calamares installer shortcut on the live image desktop. It segfaulted when I tried setting up an encrypted partition. It’s safer to restart the machine and pick the graphical installer from the boot menu instead.
Installation #
Once in the graphical installer, there’s nothing unusual - just a standard Debian installation. I’ve noticed that the trackpad didn’t work, but other than that, all the hardware including the wireless card works. However, the connection is really poor (more on that later), so move closer to your router if you can, and make sure you have a 2.4GHz network (or use your phone’s hotspot) - 5GHz won’t work, but don’t worry, we will fix it later 😉
By default, if you want an encrypted drive, Debian still uses 1GB of swap [1] [2]. I thought that’s not enough, so I wanted to go with manual partitioning instead of guided (with LVM encryption).
Manual partitioning is covered widely in the web, so I won’t go into details here. I’ve created a 0.5GB EFI partition, 1GB boot partition, and an encrypted partition for the remaining space. Then, for that encrypted partition, I’ve set up an LVM volume group with two volumes - root and swap.
This is what I ended up with:
❯ lsblk
NAME                  MAJ:MIN RM   SIZE RO TYPE  MOUNTPOINTS
sda                     8:0    0   113G  0 disk
├─sda1                  8:1    0   512M  0 part  /boot/efi
├─sda2                  8:2    0     1G  0 part  /boot
└─sda3                  8:3    0 111.5G  0 part
  └─sda3_crypt        253:0    0 111.5G  0 crypt
    ├─debian--vg-root 253:1    0 103.8G  0 lvm   /
    └─debian--vg-swap 253:2    0   7.6G  0 lvm   [SWAP]
Second gotcha: for some reason, I wasn’t asked to set a password for my physical volume for encryption. It may be an installer bug, or I somehow missed it - either way, I ended up with no encryption and had to start over. Make sure there’s a password set at that step, before LVM is configured 😅
That’s it. After a while, your system should be ready to go! Once rebooted, the trackpad works fine too.
Post-Install Tweaks #
WiFi Performance #
After installation, WiFi works - but the network performance is terrible. After some research I found there are three competing Linux drivers for BCM43224:
-
b43- open source, community maintained. -
brcmsmac- open source, included in the mainline kernel. For BCM43224 specifically, it struggles to maintain stable 5GHz connections and overall throughput is poor. -
wl(broadcom-sta-dkms) - Broadcom’s own proprietary driver, out-of-tree, requires DKMS to recompile after kernel updates. Broadcom stopped actively developing it around 2015, but Debian’s maintainers patch it to keep it working. Does not support WPA3 - if your router is set to WPA3-only, switch it to WPA2 or mixed mode.
Fixing the Driver #
From my experience, the default brcmsmac driver is unstable on BCM43224 and
effectively limited to 2.4GHz. The only one that works with acceptable
performance is wl. Here’s how to install it:
First, enable non-free packages in /etc/apt/sources.list, for example:
deb http://deb.debian.org/debian/ trixie main contrib non-free non-free-firmware
deb http://security.debian.org/debian-security trixie-security main contrib non-free non-free-firmware
deb http://deb.debian.org/debian/ trixie-updates main contrib non-free non-free-firmware
deb http://deb.debian.org/debian/ trixie-backports main contrib non-free non-free-firmware
Then install the proprietary driver and blacklist open source alternatives.
Note that we are installing the linux-headers-amd64 meta-package - this way,
when the kernel is updated, header files will also be updated, and DKMS will be
able to properly recompile the Broadcom driver for the new kernel.
sudo apt update
sudo apt install broadcom-sta-dkms linux-headers-amd64

sudo tee /etc/modprobe.d/broadcom.conf << EOF
blacklist b43
blacklist b43legacy
blacklist brcmsmac
blacklist bcma
blacklist ssb
EOF

sudo update-initramfs -u
sudo reboot
That should result in a proper 5GHz connection and much more stable network speeds. At home, I’m able to hit ~120Mbps DL / 50Mbps UL (my provider limit), which is roughly matching the performance under macOS.
RAM Usage #
I was concerned that 4GB won’t be enough, that’s why I’ve added plenty of swap space. And swap is used, I can occasionally see 2-3GB of swap taken. For example, this is how it looks, with 2 Firefox windows, each with a couple of tabs, one with YouTube playing, a PDF, LibreOffice Writer, Signal, etc. - a typical light workflow:
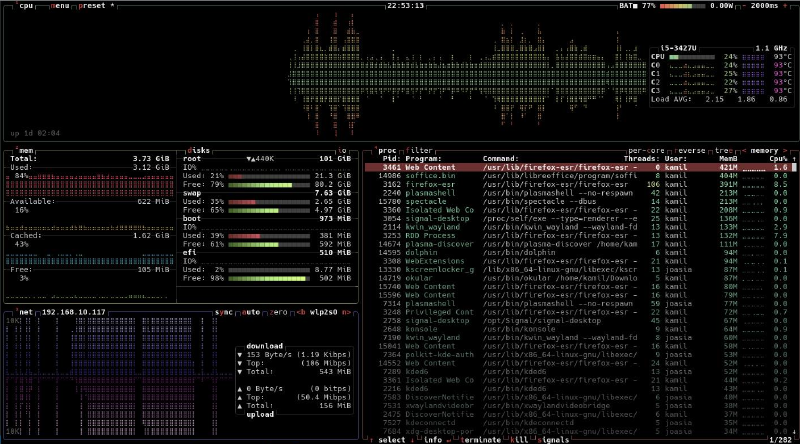
As you can see, it’s not bad, and there’s still a bit of headspace with around 0.6GB of RAM still available.
Verdict #
The installation was much easier than I thought. The WiFi driver took a while to figure out, but once done, the performance is acceptable. And the system feels much snappier now. This really is a testament to great hardware this little laptop was built with, and I think it still has a few years to go before it becomes obsolete. Debian + KDE is a good match, offering a clear speed improvement, and for me it has all that I need.
Downsides? I keep hitting Command instead of Alt, so I think this needs a remap
at some point… And I feel like it is slightly hotter than on macOS, but still
within acceptable limits, nothing that can prevent you from using it on your
lap. I’ve also noticed that the power profiles are not available, but my laptop
is mostly stationary anyway. To limit battery charging, you can use tlp with
applesmc-next and set max charge to
80%, to preserve it a bit more.
I hope this was helpful. It proves that old hardware can still get a new life, running a modern system with up-to-date security patches.